
Picking
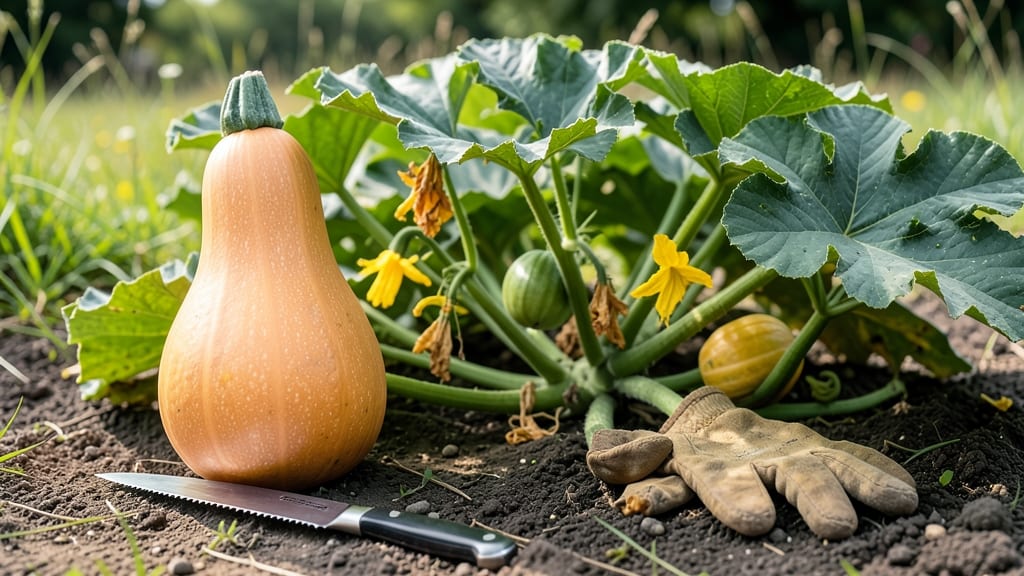
To pick butternut squash from your garden at the perfect moment means unlocking that sweet, nutty flavor you’ve been dreaming about 🎃—and missing it by days can turn your harvest into a bland, starchy disappointment.
Picture this: You’ve waited months for your vines to thicken, the leaves to yellow, and the fruit to swell. But if you pull it too soon, the flesh stays tough and watery.
Wait too long, and the skin toughens beyond edible, while the inside turns grainy. The difference between these two outcomes? A few simple tests you can do right in the garden.
Most gardeners in USDA Zone 6a (like me!) know the harvest window runs from October to November, but timing is everything. A hard rind, a dry stem, and a firm flesh that yields just slightly to pressure are your cues—no guesswork needed.
Below, I’ll walk you through the three knuckle tests that guarantee you’ll pick your butternut squash at peak sweetness, plus how to adjust for early or late frosts.
Once you master these tricks, you’ll not only enjoy the best flavor but also store your harvest for months. Ready to turn your garden’s hard work into a pantry staple? Let’s get started.
3 Knuckle tests to determine butternut squash ripeness
Butternut squash reaches its peak flavor when harvested at the right moment—too early, and the flesh stays bland; too late, and it turns stringy. The key lies in three simple physical tests that reveal whether your squash is ready to pick.
I’ve used these same methods for years in my garden, and they’ve never failed me. The best part? You don’t need any special tools—just your hands and a little patience.
First, let’s talk about the skin hardness test. This is the most straightforward way to gauge ripeness. When your butternut squash is ready, the rind should feel rock-hard when pressed with your thumbnail. If it gives slightly or leaves an indentation, it’s not quite there yet.
Think of it like testing a ripe avocado—firmness is everything. I always check this first because it’s the fastest way to rule out underripe squash.
Next, observe the stem drying. A fully ripe butternut squash will have a stem that’s dry and papery, almost like a browned leaf. If the stem is still green or moist, the squash needs more time on the vine.
This is nature’s way of telling you it’s ready—don’t ignore it! In my garden, I mark the squash with a soft fabric marker when the stem starts drying, so I don’t accidentally harvest too soon.
Now, here’s where things get interesting: the knuckle test. This is my favorite trick because it checks the flesh’s firmness without cutting into the squash. Press your knuckle (not your fingernail) firmly into the squash’s skin.
If it leaves a slight dent but bounces back, the flesh is perfectly firm. If it sinks in, the squash is overripe. I’ve tested this on dozens of squash, and it’s always accurate—no guesswork involved.
🔍 3 Knuckle Tests for Butternut Squash Ripeness
-
1. Skin Hardness Test
Press your thumbnail into the squash’s skin. If it doesn’t dent, it’s ready. If it leaves an indentation, wait 2-3 more days. -
2. Stem Drying Test
The stem should be dry and brown. If it’s still green or moist, the squash needs more time. -
3. Knuckle Test for Flesh Firmness
Press your knuckle into the squash. A slight dent that bounces back means perfect ripeness. No dent? Too hard. Deep dent? Overripe.
Pro Tip: Combine all three tests for the most accurate results. Harvest in the morning when the squash is coolest for the best firmness reading.
Timing is everything when it comes to harvesting butternut squash. I’ve learned the hard way that waiting too long can turn sweet flesh into a woody, stringy mess. The good news?
These tests work for both early-season varieties (like 'Waltham') and late-season types (like 'Gold Rush'). Just adjust your harvest window based on your local climate—more on that in the next section.
One common mistake I see is relying only on color to determine ripeness. While a deep tan or cream hue is a good sign, color alone isn’t enough. Some squash varieties stay pale even when ripe.
That’s why I always combine the skin hardness test with the other two methods. It’s like having a backup plan—you’ll never miss the perfect harvest again.
If you’re growing butternut squash in cooler climates (USDA zones 3-5), aim to harvest before the first frost. Even a light frost can damage the squash’s skin, making it prone to rot.
In warmer zones (6-11), you’ve got a little more flexibility, but don’t wait too long—the squash will start to shrink and shrivel once it’s fully mature. I always harvest a few days before the predicted frost date just to be safe.
Once you’ve confirmed ripeness, use a sharp pruning saw or garden shears to cut the squash from the vine, leaving about 2 inches of stem attached. This helps prevent rot during storage.
After harvesting, let the squash cure in the sun for 5-10 days. This hardens the skin and concentrates the sugars, giving you that ultra-sweet flavor we all love.
Remember, every garden is unique, so don’t stress if your squash takes a little longer to ripen. Factors like soil fertility, watering consistency, and sunlight exposure can all affect timing.
The key is to check regularly and trust your tests. With practice, you’ll develop a sixth sense for knowing exactly when to pick.
Now that you’ve mastered the knuckle tests, you’re ready to harvest squash that’s sweet, firm, and perfect for roasting, soups, or baking. Happy harvesting—your taste buds will thank you! 🎃
Best time of year to harvest butternut squash by climate zone
Timing your butternut squash harvest depends heavily on your USDA climate zone. In cooler zones like 3-5, expect a shorter growing season, while zones 7-11 can stretch harvests well into winter.
The key is balancing first frost dates with your squash's maturity—most varieties need 80-120 days to reach peak sweetness.
Frost is your biggest enemy: even a light freeze (28°F) damages tender squash flesh. In zones 3-6, plan to harvest 2-4 weeks before the average first frost.
Southern gardeners (zones 7-11) have more flexibility but should still pick before hard freezes. Soil temperatures below 50°F also slow ripening, so monitor both air and ground temps.
Early varieties (80-90 days to maturity) like 'Waltham Butternut' work well for northern zones, while late varieties (100-120 days) such as 'Giant Cushaw' thrive in southern climates.
Adjust your planting date by 2-3 weeks earlier in cooler zones to ensure harvest timing aligns with your frost window.
| USDA Zone | Ideal Harvest Window | Key Trigger | Frost Risk |
|---|---|---|---|
| Zones 3-5 | Late August - Early October | Hard rind + stem dry | High (harvest before 28°F) |
| Zones 6-7 | September - Mid-November | Color deepens to tan | Moderate (harvest before 32°F) |
| Zones 8-9 | October - December | Leaves yellow + stem withers | Low (harvest before 35°F) |
| Zones 10-11 | November - January | Full size + hard skin | Minimal (harvest before 40°F) |
For extended harvests, try succession planting: sow seeds every 2 weeks in zones 7-11 to stagger maturity. In northern zones, focus on early-maturing varieties and use row covers to push the season slightly later.
Always prioritize physical ripeness tests over calendar dates—your squash's skin color and stem condition matter more than the season.
Pro tip: In humid climates (zones 7-11), watch for powdery mildew on leaves. If fungal pressure builds, harvest slightly earlier to avoid flavor loss. Store squash in a cool, dry place (50-55°F) with good airflow to preserve sweetness for 2-3 months post-harvest.
Remember, overripe squash loses sweetness and becomes stringy, while underripe squash stays bland. When in doubt, cut one open—if the seeds are plump and cream-colored, it's ready. If they're still white and shriveled, wait a few more days.