
Picking
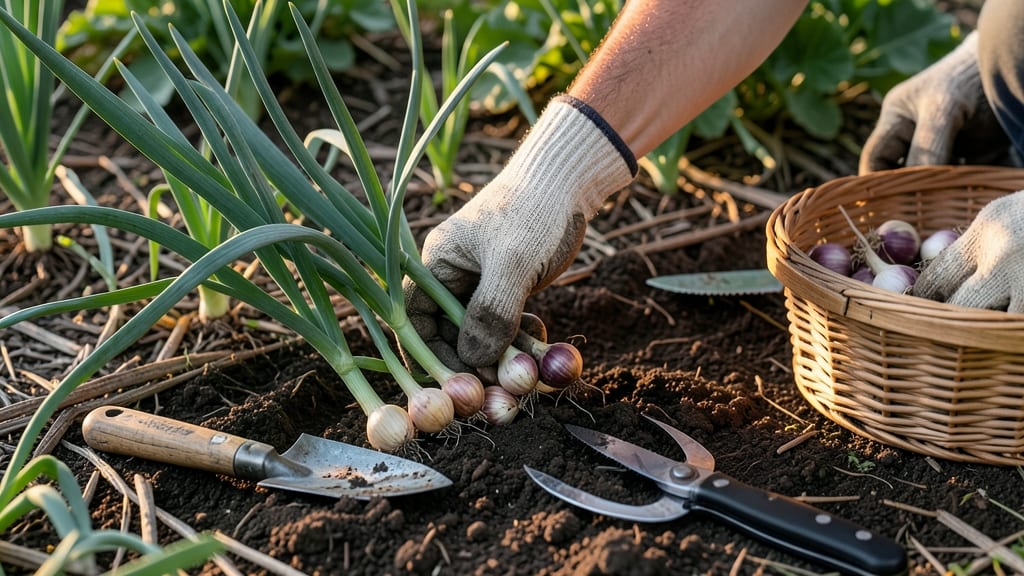
Harvesting shallots from your garden at the right time means the difference between bold, flavorful bulbs and sad, shriveled scraps.
Picture this: you’ve nurtured your 🧅 shallots all season, and now the tops are turning yellow—but is it too late? Or just right? One wrong move, and you’ll lose next year’s harvest too.
I’ll show you exactly when to pull them and how to handle them so they last all winter.
Most gardeners wait until August or September, but timing matters more than the calendar. The bulbs need to be firm and golf-ball-sized, with papery skin that peels back easily. Miss this window, and you’ll end up with split or moldy shallots that won’t store well.
In this guide, I’ll walk you through the step-by-step process, from digging to drying to storing, plus the three biggest mistakes that ruin harvests. By the end, you’ll know how to pull shallots like a pro—and enjoy a pantry full of homegrown flavor.

When to harvest shallots for best flavor and bulb size
Timing your shallot harvest is everything—wait too long, and you risk shriveled bulbs that split apart. Harvest too early, and you’ll miss out on that rich, sweet flavor and maximum bulb size.
The key is watching for 3 critical signs that your shallots are ready to pull from the soil.
First, focus on the foliage color. When the green tops turn yellow and begin wilting, that’s your first clue. This natural dying-back signals the plant is redirecting energy to the bulb development.
Next, check the bulb size—they should be about the size of a golf ball (roughly 1.5 to 2 inches in diameter).
Finally, the skin texture matters. Ready-to-harvest shallots have a dry, papery skin, unlike the tight, moist skin of immature bulbs. If you gently tug on a shallot and it slips easily from the soil, that’s another green light to harvest.
Ignore these signs, and you might end up with overripe shallots that fall apart when stored.
Climate plays a huge role in harvest timing. In cooler regions (USDA Zones 3-5), aim to harvest shallots in late August to early September, just before the first frost. In warmer zones (Zones 6-10), you can extend the harvest window into October, but avoid waiting too long—hot, dry weather can cause bulbs to split.
Here’s a quick seasonal harvest guide based on your location. Northern gardeners should prioritize early harvests to beat frost, while southern gardeners have more flexibility. Always err on the side of harvesting slightly early—you can cure and store shallots for months, but you can’t un-harvest them!
| Harvest Indicator | Description | Best Time to Harvest |
|---|---|---|
| Foliage Color | Yellowing and wilting tops | Late summer to early fall |
| Bulb Size | Golf ball-sized (1.5-2 inches) | 90-110 days after planting |
| Skin Texture | Dry and papery | Before first frost |
| Ease of Removal | Gently tugs free from soil | August-September (varies by zone) |
| Climate Zone 3-5 | Harvest before frost | Late August |
| Climate Zone 6-10 | Extend to October | Early October |
If you’re growing shallots in containers, the harvest process is slightly different. Container-grown shallots often mature faster due to warmer soil temperatures. Monitor them closely, as they may be ready 2-3 weeks earlier than in-ground plants.
Look for the same yellowing tops and firm bulbs, but don’t wait until the soil cools too much.
One common mistake is harvesting shallots after a hard frost. Frost can cause the bulbs to sprout or rot, ruining your crop. If frost is coming, harvest a few days early and cure the shallots indoors to extend their shelf life.
Pro tip: Leave the foliage attached for 1-2 days after harvest to help the bulbs absorb remaining nutrients.
For best flavor and storage life, aim to harvest shallots when they’re fully mature but not overripe. Overripe shallots lose their sweetness and crispness, becoming tough and pungent.
The earlier you harvest within the optimal window, the better—this ensures you get the peak flavor and firm texture that makes shallots so versatile in the kitchen.
Remember, shallots are perennial plants, meaning they’ll regrow from the same bulbs if not fully harvested. To encourage larger bulbs next season, dig up the entire clump and separate the individual shallots after harvest. Store them in a cool, dry place until replanting time in early spring.
Step-by-Step guide to digging up shallots without damaging the crop
Once your shallots show the perfect harvest signs—yellowing foliage and firm bulbs—it’s time for the most critical step: gentle extraction. The wrong technique can bruise bulbs or even sever next year’s regrowth points, so precision matters. Follow these proven steps to harvest your crop without stressing the plants.
Start by choosing a dry, sunny day for digging. Wet soil sticks to bulbs, making them harder to clean and increasing the risk of rot. Early morning is ideal because the ground is firm but not baked hard.
Gather your tools: a hand fork, garden gloves, and a baking sheet for curing.
How to Harvest Shallots from the Garden
- 🌱 Step 1: Loosen the Soil
Use your hand fork to gently loosen the soil around the shallot clumps. Insert the fork 2-3 inches away from the base and work it in a circular motion to avoid piercing bulbs. - 🪴 Step 2: Lift Gently
Grasp the green tops and pull upward with a slow, steady motion. Resist the urge to yank—shallots often come up whole if you’re patient. If some bulbs stay behind, use your fork to pry them free without cutting. - ✂️ Step 3: Trim the Tops
Once lifted, snip the foliage to 1-2 inches above the bulbs using clean scissors. Leave stubs to prevent moisture loss during curing, but remove any damaged or diseased leaves immediately. - 💧 Step 4: Cure the Bulbs
Lay shallots in a single layer on a baking sheet in a dry, shaded spot (like a garage or porch) for 1-2 weeks. This air-drying process toughens the skins and prevents rot. Avoid direct sunlight, which can scorch the bulbs. - 🌿 Step 5: Store Properly
Once fully cured, brush off excess dirt and store shallots in a mesh bag or paper sack in a cool, dark place (like a pantry). They’ll keep for 2-3 months if stored with good air circulation.
After curing, inspect your shallot bulbs for any that split or show signs of disease. These should be used immediately in cooking or composted to avoid spreading issues to your stored crop.
The key to long-term storage is low humidity—never refrigerate unless you plan to use them within a few weeks.
Pro tip: Save the largest, healthiest bulbs for replanting next spring. Shallots multiply underground, so even a few left in the soil can regrow into a full patch. Just mark their location with stakes or flags to avoid disturbing them during winter.
With this method, you’ll preserve the flavor, size, and longevity of your harvest while ensuring next year’s crop thrives. Happy digging! 🧅