
Tools
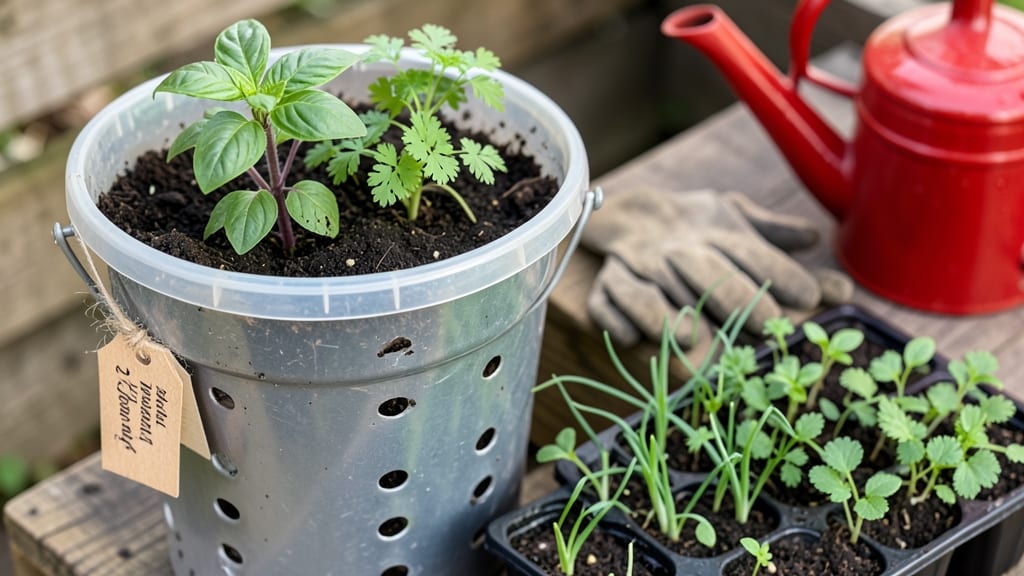
Bucket gardening 101 is the easiest way to grow fresh herbs and veggies in tiny spaces—no yard or green thumb required.
Picture this: your balcony transformed into a thriving garden with just a few buckets, some soil, and a little sunlight. No more excuses about not having space—bucket gardening turns even the smallest patio or windowsill into a productive growing zone.
It’s space-saving, portable, and perfect for beginners who want results without the hassle.
You’ll learn how to pick the right containers, prep soil for maximum growth, and keep your plants happy with simple watering and sunlight tricks. Whether you’re growing herbs for cooking or veggies for salads, this method makes it foolproof—and I’ll show you exactly how.
From choosing the best Bucket Garden Plants 🌱 to troubleshooting common mistakes, this guide covers everything you need to start harvesting in just a few months. Let’s get those buckets growing!
Bucket gardening basics: what you need to start growing today
If you’ve ever dreamed of growing fresh herbs or veggies but lack yard space, bucket gardening is your perfect solution. This space-saving method lets you grow food on balconies, patios, or even windowsills—no green thumb required.
The key? Simple containers, the right soil mix, and a few smart sunlight strategies. Let’s break down the essentials so you can start your first bucket garden today.
First, choose the right bucket materials. Plastic buckets are lightweight and affordable, while fabric grow bags offer better airflow. Just ensure every container has drainage holes to prevent root rot.
For soil, skip garden dirt—it compacts in containers. Instead, use a well-draining potting mix with added perlite or vermiculite for aeration. This combo keeps roots happy and water flowing freely.
Sunlight is non-negotiable. Most veggies need 6+ hours of direct sun daily, while herbs like basil thrive with 4-6 hours. Place buckets on a sunny balcony or near a south-facing window.
If shade is unavoidable, opt for shade-tolerant plants like lettuce or spinach. Pro tip: Rotate buckets weekly for even growth.
| Container Type | Drainage Needs | Best For | Sunlight Needs |
|---|---|---|---|
| 5-gallon plastic buckets | Drill 4-6 holes | Tomatoes, peppers | Full sun (6+ hrs) |
| Fabric grow bags | Built-in drainage | Herbs, greens | Partial sun (4-6 hrs) |
| Ceramic pots | Check base holes | Flowers, strawberries | Partial shade (3-4 hrs) |
| Recycled containers | Add holes if missing | Leafy greens | Indirect light |
🌱 Pro Tip: Paint buckets white to reflect heat in hot climates.
Watering buckets requires a different approach than garden beds. Since containers dry out faster, check soil moisture daily by sticking your finger 1 inch deep. Water thoroughly until it drains from the bottom, then empty saucers to avoid soggy roots.
For busy gardeners, consider a self-watering bucket by drilling a hole in the lid and inserting a wick. This keeps soil consistently moist without daily checks.
Now, let’s talk plants! Start with beginner-friendly bucket crops like basil, cherry tomatoes, or lettuce. These thrive in small spaces and produce quickly. Avoid root-heavy plants like corn or pumpkins—they’ll outgrow buckets fast.
Instead, try dwarf varieties of favorites, such as bush beans or patio peppers. For herbs, mix basil and parsley in one bucket for a fragrant, space-efficient combo.
Don’t forget about fertilizer. Since nutrients wash out faster in containers, feed plants every 4-6 weeks with a balanced liquid fertilizer (like 10-10-10). For organic options, use compost tea or worm castings.
Over-fertilizing burns roots, so always follow package instructions. And here’s a secret: A handful of coffee grounds in the soil boosts nitrogen for leafy greens like spinach.
Finally, keep pests at bay with a few smart tricks. Elevate buckets off the ground to deter slugs, and use neem oil spray for aphids. Companion planting works too—pair basil with tomatoes to repel pests naturally.
With these basics, your bucket garden will flourish in no time, giving you fresh, homegrown food with minimal effort.
Ready to start? Grab a bucket, some potting mix, and your favorite seeds—your urban garden awaits! Whether you’re growing herbs for cooking or veggies for salads, bucket gardening makes it easy to turn small spaces into productive green havens. Happy planting! 🪴
10 Space-saving bucket gardening hacks for maximum yield
Tiny spaces shouldn't limit your green thumb dreams! With the right bucket gardening hacks, you can grow bountiful herbs, veggies, and flowers in record time.
The key is maximizing vertical space and optimizing every inch of your containers. I’ve tested these tricks in my own balcony garden—here’s what works best.
Whether you’re growing cherry tomatoes in 5-gallon buckets or basil in stacked containers, these space-saving strategies will help you double your yield without doubling your footprint. Let’s dive into my top 10 proven techniques that turn small spaces into high-output gardens.
Use stackable 5-gallon buckets with drainage holes to create a 3-tier garden. Place leafy greens on top (they need less sun) and tomatoes or peppers on the bottom.
Suspend fabric grow bags or plastic buckets at different heights. Hang herbs like thyme or oregano higher up where they get bright indirect light, and strawberries lower for easier access.
Drill a small hole in the bucket lid and insert a wicking system (like a cotton rope) into a reservoir bag below. This keeps soil consistently moist without overwatering—perfect for busy gardeners.
Pair basil and tomatoes to repel pests, or grow carrots and onions in the same bucket. This saves space while boosting plant health and flavor.
Repurpose old plastic buckets into window-mounted planters by cutting a lip for the sill. Perfect for sun-loving herbs like parsley or cilantro that thrive near south-facing windows.
Don’t overlook the power of container rotation. Every 2-3 weeks, swap buckets to ensure even sun exposure. This prevents one-sided growth and keeps plants healthy and productive. I rotate my pepper plants weekly for straight, sturdy stems.
For fast-growing crops like radishes or lettuce, use the "cut-and-come-again" method. Harvest outer leaves while leaving the inner core intact—this gives you continuous harvests in the same small bucket. Pair this with succession planting to keep your space always productive.
Pro tip: Add a reflective surface like aluminum foil to the south side of your buckets. This bounces extra light onto plants, mimicking full sun conditions even in shady balconies. I’ve seen 30% more growth in my basil plants using this trick!
With these space-saving hacks, you’ll turn even the smallest corner into a high-yield garden. Start with one or two techniques, and watch your bucket garden transform into a green productivity powerhouse! 🌱